
Creating a Paid Registration
Charge a fee for a sign-up, see what people see when they pay, and choose who covers the service fee.
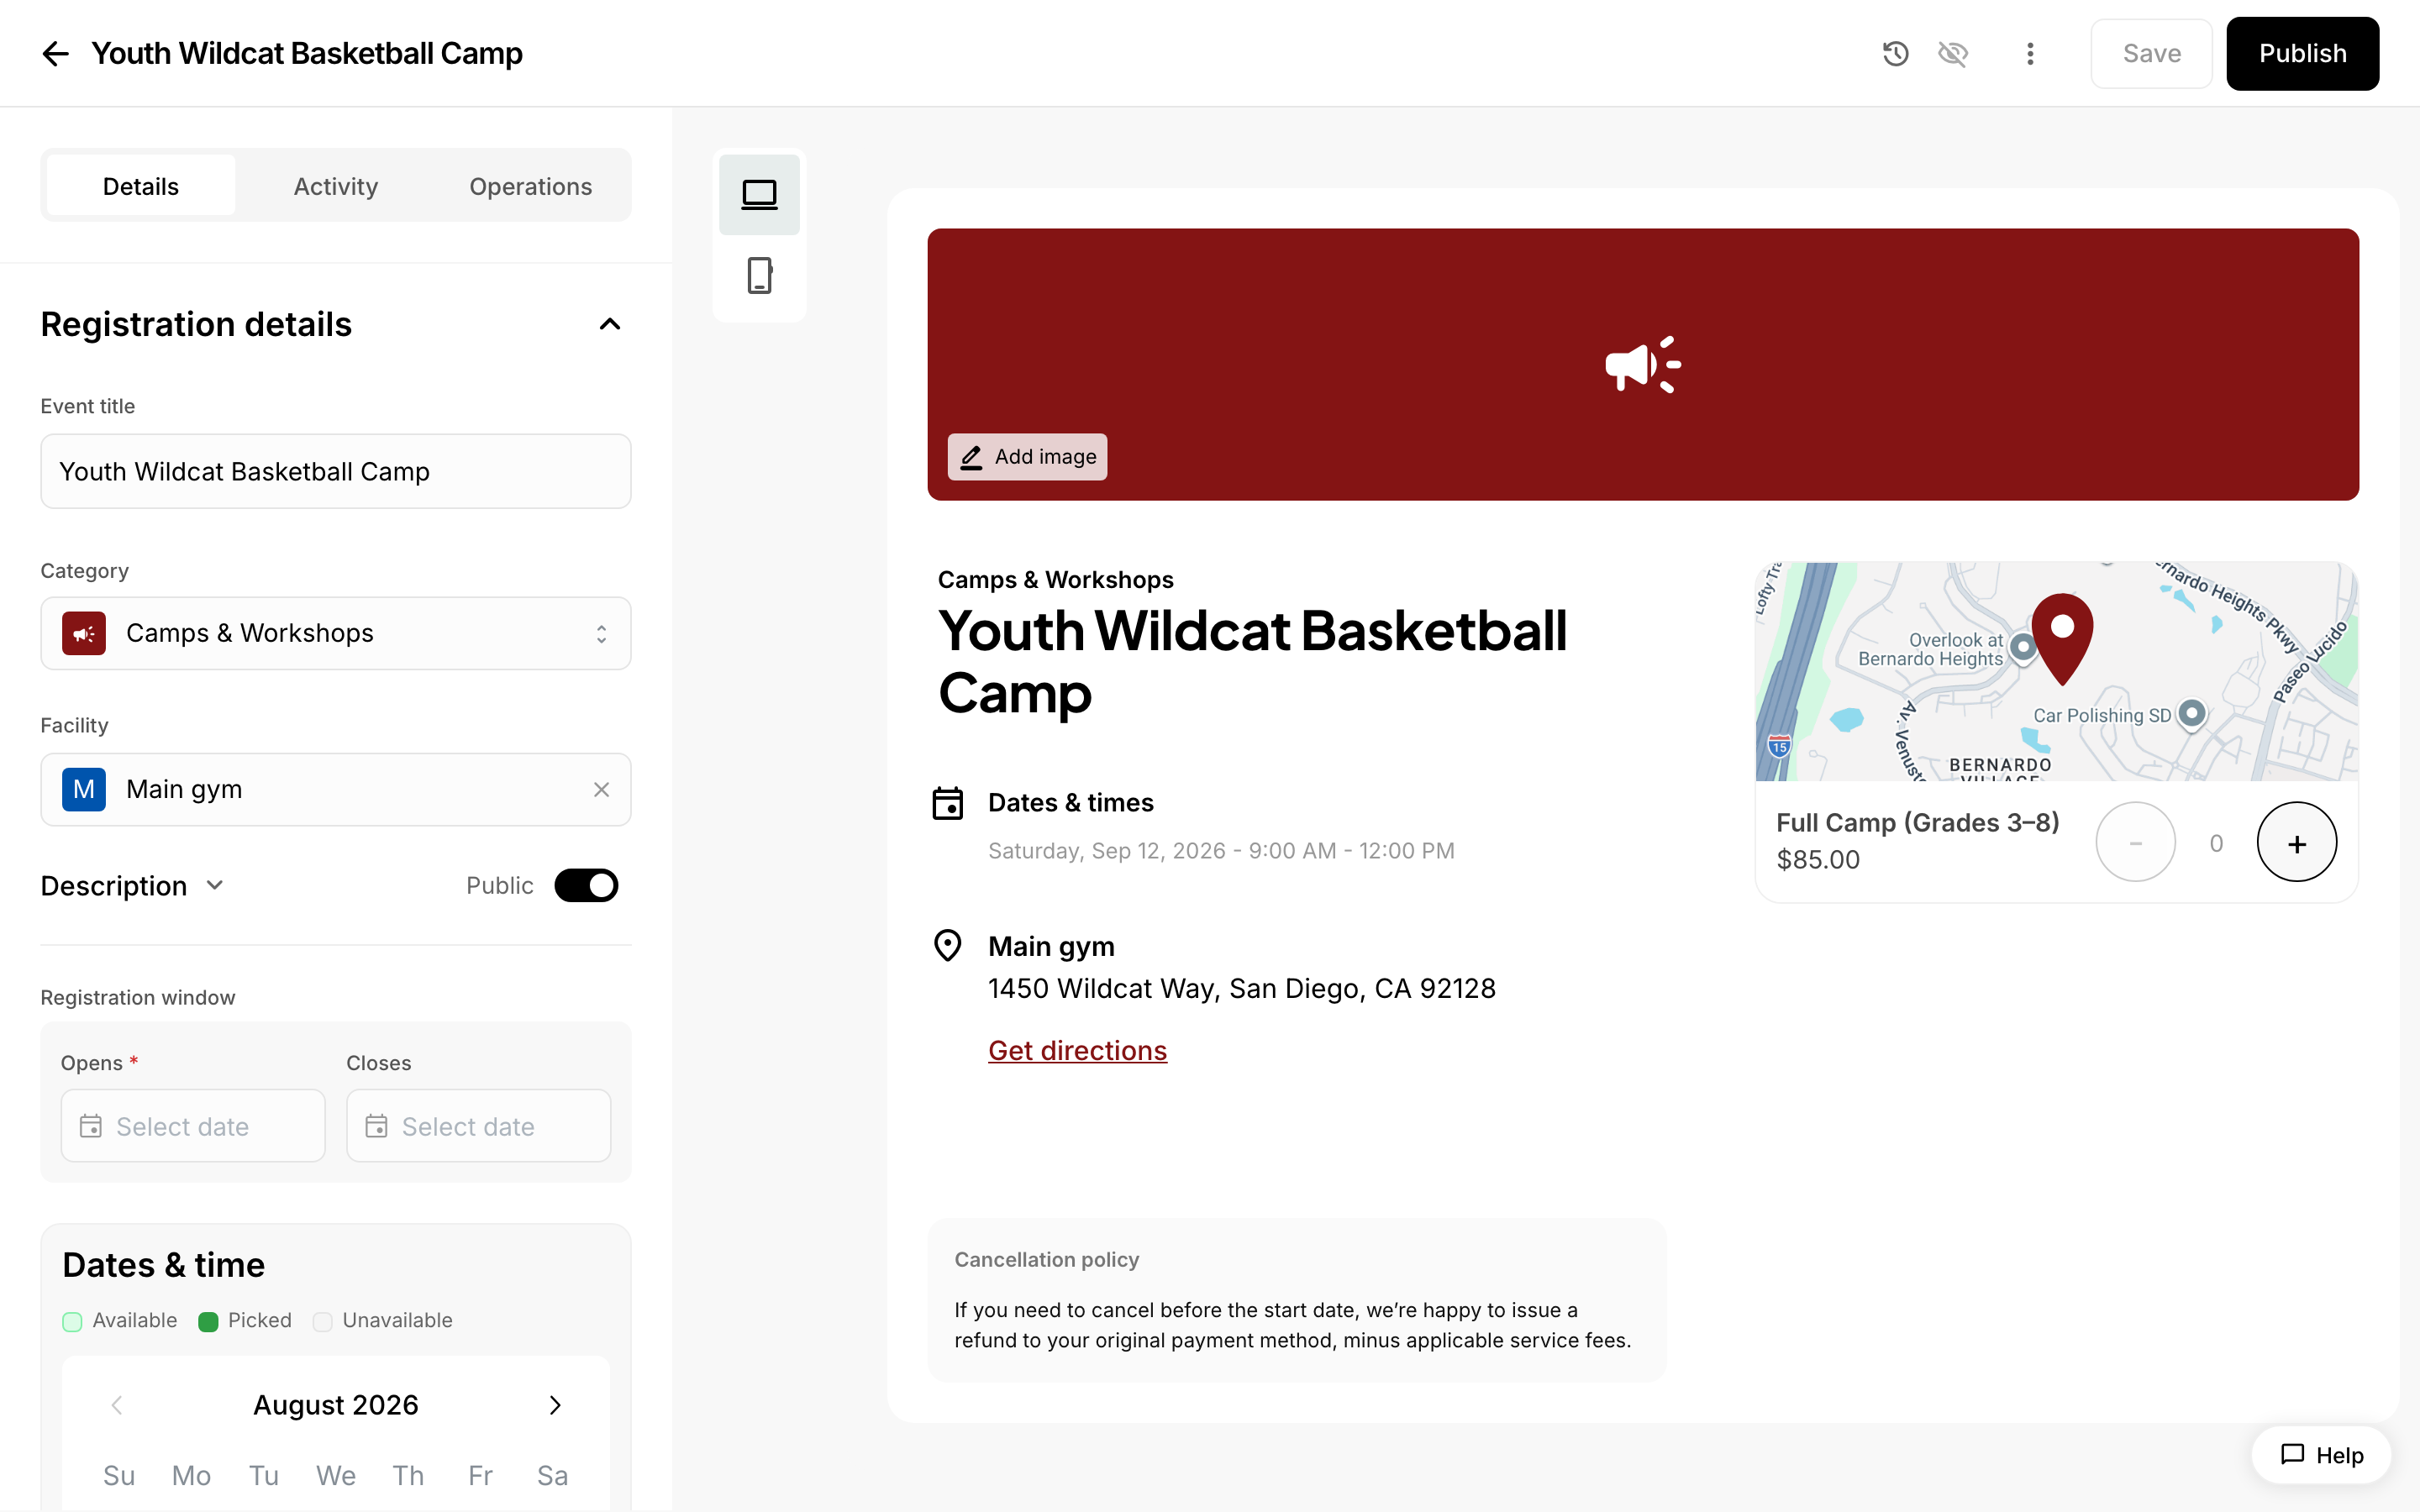 Set pricing when you build a registration.
Creating a Paid Registration
Use this article when people need to pay to sign up. For example, you might run a camp with a player fee, a club with dues, or a clinic with an early-bird rate. By the end, at least one option in your registration will have a price. You will also know what people see when they pay and who covers the fees.
You will see two terms often:
- A registration type is one option people can sign up for, such as "Player" or "Early bird." Each type has its own title and price. It can also have its own capacity.
- A participant is a person being signed up. One buyer can sign up more than one participant. For example, a parent might sign up two children.
A registration is paid when at least one of its registration types costs more than $0.
How a paid registration differs from a free one
You build a paid registration the same way as a free one until you reach pricing. You create the registration, set when sign-ups open and close, set the capacity, and attach a custom form if you need more information from people. The only extra step is giving one or more registration types a price.
You don't choose "free" or "paid" at the start, and you can change it later. One registration can have both free and paid types. For example, you could offer a $75 "Player" type and a $0 "Volunteer" type.
If you have never built a registration, start with Creating a Free Registration. It covers dates and capacity in full. Then come back here for pricing.
Create the registration
- From your dashboard, open the Create a registration dialog.
- In Title, type a name, such as "Summer Basketball Camp."
- In Category, choose a category. The Create button stays greyed out until both Title and Category are filled in.
- (Optional) In Facility, choose where the registration takes place. If your facility isn't in the list, choose the add-new option in that menu. The Add facility panel opens. When you save the new facility, you go back to the dialog with that facility already selected.
- If your facility has separate areas, such as courts or rooms, a second menu appears. Choose the areas you need.
- Click Create. The dialog closes and the registration details editor opens. You set prices, capacity and dates in this editor.
If your account can change school settings, the Category menu has an add-new option too. It opens the Add category panel. The new category is selected for you when you save it.
What if I don't know the dates yet?
You can create the registration anyway, because the create dialog doesn't ask for dates. You set dates and times later in the registration details editor, which is also where you set up repeating schedules. So you can create the registration and set prices now, then add the schedule once you have it.
If you opened the dialog by clicking a time slot on your calendar, the new registration starts with that slot. If you clicked only a start time, the slot is two hours long. You can change it or add more dates in the editor.
Set a price on each registration type
- Open the registration details editor for your registration.
- In the Registration types section, add a type and give it a title, such as "Player."
- In that type's Price field, enter the amount you want to charge.
- Repeat steps 2 and 3 for every other type that needs a price.
- To keep a type free, leave its price at $0.
A paid type has to cost at least $1.00. If you enter an amount above $0 but below $1, it is rounded up to $1.00.
Set a capacity for one registration type
The registration has an overall Capacity. You can also give a single registration type its own limit. For example, you could allow 40 players and 10 volunteers in the same registration. Once a type is full, new participants can't choose it.
What happens if I set a type's capacity below the number already sold?
The change isn't saved, and the registration stays as it was. Set the capacity to at least the number of spots already sold for that type, or leave it unchanged.
What participants see at checkout
On the public registration page, participants:
- Choose a registration type and quantity.
- Add the people they are signing up.
- Fill in your custom form, if you attached one.
- Pay.
They can pay in any of these ways:
- With a credit or debit card.
- With an express option such as Apple Pay or Google Pay, if their device supports it.
- Straight from a bank account, if your organization has this turned on and the registration accepts it. Bank account payments are often called ACH.
Your cancellation policy is shown on the registration page, so people can read it before they pay. Once the payment goes through, they see a confirmation page and get a receipt by email.
If a participant chooses only free ($0) types, they don't pay anything. Instead, they enter an email address to hold their spot. If the address isn't valid, the message "Enter a valid email address." appears next to the email field so they can correct it.
What happens if a participant picks a type that just sold out?
Someone else might take the last spot while a participant is still checking out. If that happens, the purchase stops and the participant sees "Sorry, this ticket type just sold out." They are not charged. They can choose a different type, or join the waitlist if you turned it on.
Can the same person be signed up twice in one registration?
No. Each person can be signed up only once per registration. A participant can't be added to two different types in the same cart. This holds even if the buyer adds them in two separate steps before checkout.
How fees work
Every paid sign-up has a service fee. The fee is a fixed amount for each sign-up plus a percentage of the price. It already covers the cost of card or bank processing, so nobody pays processing as a separate charge.
Your organization's fee rates can depend on how someone pays: card online, bank account, or card in person. This article can't confirm the exact rates on your account. To find them, check your organization's payment settings or contact Admittee support.
Your organization's payment settings also decide who covers the fee:
- Your organization covers it. The participant pays only the registration price. The fee comes out of your payout.
- The participant covers it. The fee is added on top of the price at checkout. You receive the full registration price.
- The participant chooses. At checkout, the participant sees a checkbox for covering the fee. It starts out checked. If they uncheck it, your organization covers the fee.
Whichever option applies, your organization receives the registration price. When your organization covers the fee, the fee is taken out of that amount first. This article can't confirm whether a single registration can use a different setting from the rest of your organization.
Do free types ever have a fee?
Not when the participant pays nothing. A $0 type on its own has no fee. But if a participant adds a paid add-on choice to a $0 type, they now owe money, and the fee applies to the amount they pay.
Promo codes, add-ons and round-up
- Promo codes. A promo code is a code you create that lowers the price, either by a percentage or by a fixed dollar amount. Participants enter it at checkout. The discount comes off each eligible sign-up before fees are calculated. With a dollar-amount code, one sign-up might become free while another in the same cart is still full price.
- Add-on choices. Some registration types offer extra choices that cost more, such as a $20 workshop. The extra cost is added for each participant who picks it, so two people on the same type can owe different amounts. Promo codes reduce only the registration price. They never reduce the add-on cost.
- Round-up. At checkout, participants may be offered the option to round their total up. The extra amount is added on top of what they owe.
Publishing and sharing
You publish a paid registration the same way as a free one. Before you can publish, the registration needs:
- A title.
- At least one registration type.
- A capacity greater than 0.
- An open date.
Your account also needs permission to publish. After you publish, the Publish button becomes Share. Use it to get the link to your registration.
What happens to the waitlist if I raise the capacity?
If the waitlist is on and you raise the capacity of a published registration, people on the waitlist may be notified automatically. This happens when the new capacity leaves room beyond your current sign-ups. It works the same for free and paid registrations.
Can I delete a registration after people have paid?
Not while it has active purchases. You have two options:
- Cancel and refund those purchases, then delete the registration. Cancelled purchases don't stop you from deleting it.
- Unpublish the registration if you only want it off your public page.
Related: see Managing Waitlists and Attendance and Creating a Free Registration.