
How to Set Up Your Facilities
Set up a facility by entering its name, capacity, address, and setup and teardown buffers, then add sub-facilities, approvers, and rental rates.
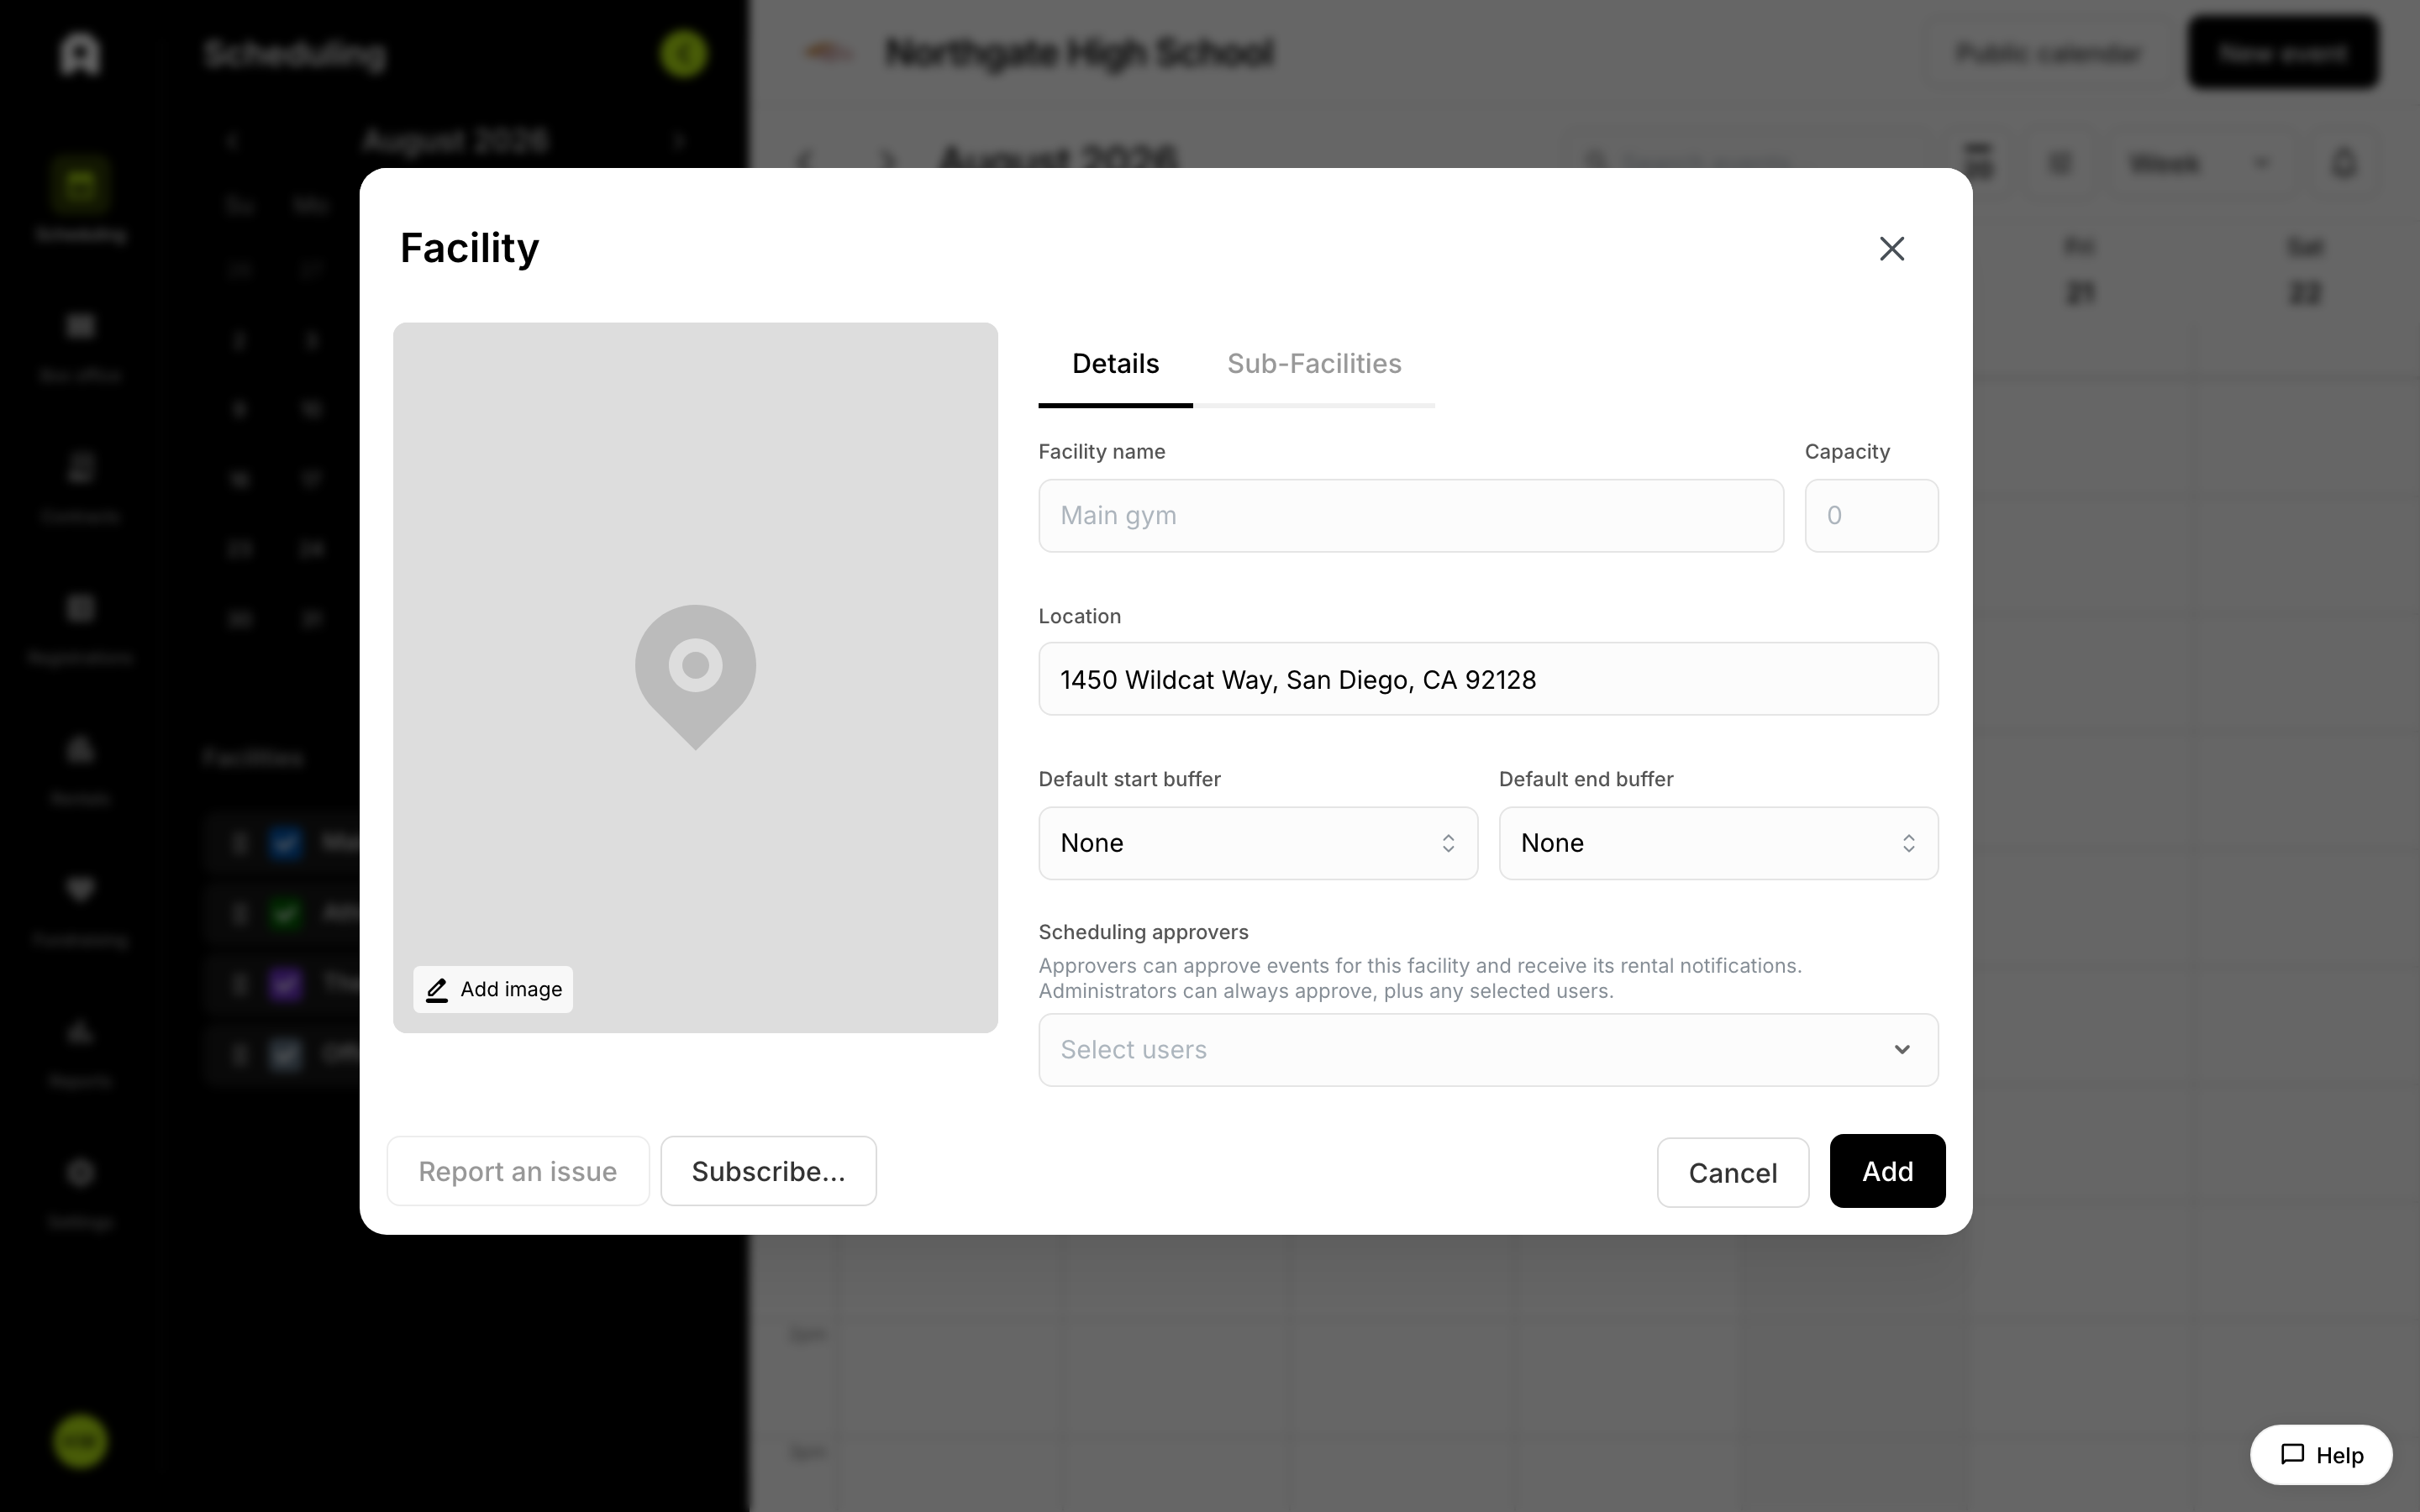 Setting up a facility with rules and rates.
How to Set Up Your Facilities
To set up a facility, open your facility settings, add a new facility, and fill in its name, capacity, address, setup and teardown buffers, and scheduling approvers. Once you save, the facility is available for scheduling events, checking booking conflicts, and (if you enable rentals) taking rental bookings.
Add a facility
- From your facility settings, choose to add a new facility. The facility form opens.
- Enter the facility details:
- Facility name (required) — the name shown throughout Admittee, for example "Main Gym."
- Capacity — the maximum number of people the space holds.
- Address — start typing and pick a match from the address suggestions so the location is accurate.
- Set the default start buffer and default end buffer (setup and teardown time). See the next section for details.
- Optionally assign scheduling approvers — people who can approve events for this facility and receive its rental notifications. Administrators can always approve; selected approvers can approve in addition to them.
- Optionally add a banner image by uploading your own or selecting one from the built-in gallery. Each facility is also given a color so its bookings stand out on the schedule.
- Choose Add to save the facility.
Once saved, the facility appears in your facilities list and becomes selectable when you create or edit events.
Set setup and teardown buffers
Buffers reserve time around a booking for setup and teardown, so back-to-back events don't collide.
- Default start buffer — time held before each booking begins.
- Default end buffer — time held after each booking ends.
At the facility level you choose from fixed durations (for example None, 15 minutes, 30 minutes, or 1 through 8 hours). These defaults apply to every event scheduled at the facility unless an individual event overrides them.
When you schedule an individual ticketed or registration event, you can also choose a dynamic "rest of day" buffer instead of a fixed length — From start of day (block the facility from the start of the day until the event) or Until end of day (block it from the event until the day ends). This is useful for events that need the space held for the whole remaining day rather than a set number of hours.
Add sub-facilities
If a facility contains multiple bookable spaces — separate gym courts, an auditorium and its lobby, or individual rooms — manage them as sub-facilities.
- Open the facility and select the Sub-facilities tab.
- Add each space by name.
- Save your changes.
Sub-facilities can be selected independently when scheduling events. Conflict detection accounts for them, so two events at the same facility that use different sub-facilities are not flagged as conflicting.
Add facility rules
You can attach rules that communicate requirements or policies to anyone booking the facility, such as cleanup expectations or restrictions. Rules are shown to renters and event organizers at booking time. Depending on your account, rules may instead be managed centrally alongside your rental settings.
Use the built-in Offsite location
Admittee includes a built-in Offsite location for one-off, off-campus events (for example a game or activity held at a neutral site).
- Offsite is a marker, not a physical space: each event that uses Offsite sets its own address, and capacity, sub-spaces, buffers, and seating charts don't apply.
- Because it's built in, the Offsite location can't be deleted.
Choose Offsite on an event when the location changes each time and you don't want to create a permanent facility for it.
Configure rental rates
Rental pricing is not set inside the facility form. If you rent facilities out, turn on rentals and set rates in your rental settings, where rates are defined per facility and sub-facility and support both hourly and daily pricing with multiple rate classes. Once configured, the correct rate is applied automatically when a rental is created for that facility or sub-facility.
For the full walkthrough, see Setting Up Facility Rentals.
After you save
Once configured, your facility is ready to:
- Be selected when creating or editing scheduled events.
- Be checked for booking conflicts, including buffer-time overlaps.
- Be filtered on in your schedule and dashboards.
- Take rental bookings, if you've enabled rentals.
To manage bookings, conflicts, and rescheduling on the calendar, see Managing Facility Schedules.